Parts of a Pumpkin Lesson Plan
What We Are Learning
Science Focus:
plant parts
Theme Vocabulary:
stem, shell, seed, pulp, flesh
Skills We’re Practicing
group discussion, critical thinking, vocabulary, relationship skills, fine-motor skills
- Pumpkin Jack by Will Hubbell follows a jack-o’- lantern through the pumpkin life cycle. As you read, ask children how the pumpkin changes over time. They will be amazed to see what sprouts at the end!
Pumpkin Wagon
Materials: orange modeling clay, green or brown pipe cleaners (some full and some cut into small pieces), egg carton, construction paper cut into small circles, glue, die
- Strengthen children’s number sense and fine-motor skills with this fun pumpkin-themed math activity.
- To start, have children help make the “wagon.” Cut off the end two cups of an egg carton, leaving 10 cups. Have children glue four circles to the sides of the egg carton to make wheels. Then have them add a handle by poking a pipe cleaner through the smaller end of the egg carton.
- Children should then work in pairs to create 10 small pumpkins. Each child should make 5 small balls of modeling clay and stick pieces of pipe cleaners in the tops for the stems. They can add googly eyes to make jack-o’-lanterns, if they’d like.
- To play the game, children will take turns rolling the die and filling the wagon with the corresponding number of pumpkins, one in each cup.
- If you’d like, you can continue to use the pumpkins as manipulatives for other math activities. counting/fine-motor skills
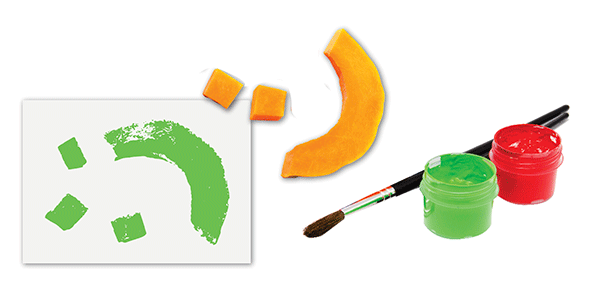
Materials: pumpkin, pumpkin carving knife, paint, construction paper or butcher paper
- This activity lets children explore the pumpkin parts they learned about in the issue—and then extend the fun with art!
- Cut open a pumpkin. Explore the parts that children learned about in the issue, like the shell, pulp, seeds, and stem. Ask children how the different parts feel.
- When you’re done, tell children you won’t be throwing the pumpkin away just yet—you’ll reuse it to make art! Create stamps by cutting the shell into different shapes. Trim each piece to remove the pulp, and create a flat surface to make an effective stamp.
- Show students how to make a print: Put the stamp in the paint, push it straight onto the paper, and lift it to reveal the shape. Have students make their own stamp prints. They can also use the stamps and other pumpkin parts, like the shell and stem, to swipe and make different kinds of marks! exploration/process art